What is a lace front wig? Simply put, it's a wig with a sheer lace panel at the front, designed to mimic a natural hairline while allowing you to style your hair away from your face. The benefits are clear: they provide a realistic look, protect your natural hair, and offer endless styling possibilities.
However, to unlock these benefits, knowing how to install a lace front wig correctly is crucial. A proper installation is the key to a secure, comfortable, and natural look. Arabella Hair will walk you through everything you need to know, from the essential tools to a step-by-step process on how to put on a lace front wig like a professional in this comprehensive guide.
Tools You Need for Lace Front Wig Installation
Before you begin your lace front wig installation, gathering the right tools is essential for a smooth and successful process. Here is a list of essential products and tools you may need:
● Wig Cap: Creates a secure base and helps flatten your natural hair.
● Adhesive: For a super secure hold. Choose from:
○ Wig Glue: For long-term wear.
○ Wig Tape: For a strong hold that is easier to remove than glue.
○ Lace Front Grip Band: A non-adhesive, velcro alternative.
● Alcohol-Based Solution: Cleanse your scalp and the wig's lace
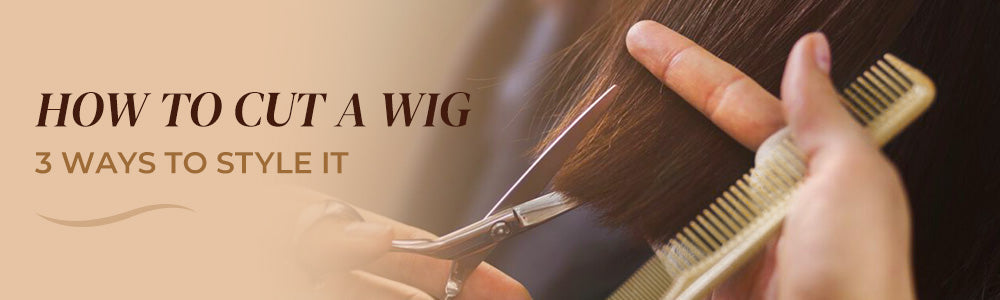
● Scissors: Trim the excess lace from the front of the wig.
● Tail Comb or Brush: Part your hair and blend it with the wig cap.
● Hair Clips or Pins: Keep your natural hair and wig sections in place.
● Blow Dryer: Speeds up adhesive drying time and helps set the lace.
● Makeup or Foundation: Blends the lace with your skin tone for a flawless finish.
How to Install a Lace Front Wig Step by Step
Now that you have all your tools ready, it's time to learn how to put on a lace front wig correctly. Follow this detailed, step-by-step guide to achieve a seamless and professional-looking installation from the comfort of your home.
Step 1. Prepare Your Hair and Scalp
The first step in putting on a lace front wig is making sure your natural hair and scalp are ready. Proper preparation creates a smooth base, prevents irritation, and helps your wig stay secure throughout the day. Follow these steps:
1. Flatten Your Hair:
● Brush your hair to remove any tangles.
● Part your hair into sections and neatly braid it into cornrows or twist it flat against your head, directing the hair backwards.
● Alternatively, you can simply brush it back and secure it with gel or pins if your hair is short.
2. Clean Your Scalp:
● Wash your hairline and forehead area with a gentle cleanser to remove oil, sweat, or residue.
● Pat dry with a towel to avoid excess moisture.
● Use alcohol wipes or toner to ensure your skin is clean, which helps adhesive or tape bond better.
Step 2. Fit Wig Cap & Customize Wig
A well-fitted wig cap and customized lace are key steps in learning how to install a lace front wig. They create a secure base and help your wig look like it's growing from your scalp.
1. Fit the Wig Cap:
● Place the wig cap over your flattened hair, ensuring it covers every strand.
● Adjust the cap so it sits snugly against your natural hairline at the front and covers your nape at the back.
● Use bobby pins or the built-in elastic straps to secure the cap in place, preventing any shifting.
2. Customize the Lace and Hairline:
● Position the lace front wig on your head and align it with your natural hairline.
● Trim the excess lace carefully with small scissors, leaving about 1/8 inch.
● Pluck a few hairs along the hairline with tweezers to create a slight irregularity, mimicking a natural growth pattern.
● Lightly apply powder or concealer on the lace to blend it with your skin.
Step 3. Put on Your Lace Front Wig
Now comes the most important step of lace front wig installation — actually placing and securing your wig. Follow these instructions to ensure it stays in place and looks natural.
1. Position the Wig:
● Hold the wig by the back and gently place it on your head.
● Align the lace front with your natural hairline, making sure the ear tabs sit evenly on both sides.
2. Secure the Wig:
● Adjust the straps inside the cap for a snug but comfortable fit.
● Clip the combs into your natural hair or wig cap for extra hold.
3. Apply Adhesive (Optional):
● If using glue, apply a thin layer along your hairline and wait until it becomes tacky.
● Gently press the lace into the adhesive, starting from the center and moving outward.
● If using tape, place small strips along the hairline and press the lace down firmly.
4. Set the Bond:
● Use a blow dryer on a cool or low-heat setting to help the adhesive dry faster.
● Press the lace with a scarf or elastic band for 10–15 minutes to ensure a secure hold.
Step 4. Style the Hairline
This step is what makes installing a lace front wig truly magical, transforming it from a wig into a believable hairline. The goal is to blend the lace seamlessly with your skin.
1. Blend the Lace:
● Apply a small amount of foundation or powder along the lace to match your skin tone.
● Lightly press the product into the lace with a sponge or brush for a smooth finish.
2. Define Baby Hair:
● Use a fine comb or edge brush to pull out a few strands along the hairline.
● Trim them shorter and style with edge control to create soft baby hairs.
● Press the lace gently with a scarf for a few minutes to secure the blend.
Step 5. Add the Final Touches
The final step in learning how to install a lace front wig is all about personalization and ensuring your style lasts. Now you can make the wig truly your own.
1. Style as Desired: Gently brush or comb through the hair to detangle. You can now part, curl, straighten, or style the wig just like you would your natural hair. Use heat-protectant sprays if applying heat.
2. Blend Your Hair (Optional): If you have any baby hairs or leave-out, blend them with the wig's hairline using a small brush and edge control gel for a seamless transition.
3. Final Check: Do a final check in bright light to ensure the lace is perfectly blended and the hairline looks natural from all angles. Lightly mist with a holding spray for extra longevity if needed.
How to Put on a Lace Front Wig from Arabella Hair
Unlike traditional wigs, Arabella Hair lace front wigs are designed for simplicity and convenience. They come with pre-cut lace, a breathable cap combined seamlessly with lace, and a pre-plucked natural hairline. This means many of the usual steps in how to install a lace front wig are already taken care of, saving you time while ensuring a realistic look.
Step 1. Prepare Your Base
Flatten your natural hair under the built-in, comfortable wig cap. No separate cap is needed!
Step 2. Position and Secure
Place the wig on your head, align it with your natural hairline, then peel off the ear tab tapes to fix the position.
Step 3. Tighten the Drawstring
Adjust the elastic drawstring at the back to secure the wig and prevent slipping.
Step 4. Refine the Look
Gently style the baby hair and blend the hairline with powder or foundation for a flawless finish.
Arabella Hair makes learning how to install a lace front wig easier than ever. With their beginner-friendly design, you can enjoy a natural, comfortable fit in just minutes. Explore our collection to find your perfect, easy-to-wear match!
FAQs About How to Install a Lace Front Wig
How to install a lace front wig without glue?
You don’t always need adhesive to achieve a secure fit. One option is using wig tape or adjustable straps inside the cap, which provide hold without the mess of glue. Another simple solution is choosing an Arabella Hair lace front wig, which comes with pre-cut lace, a snug cap, and pre-plucked hairline—making putting on a lace front wig fast, easy, and natural-looking. These alternatives allow you to enjoy a flawless style without adhesive.
What is the correct placement for the front of a wig?
The correct placement for the front of a wig is right along your natural hairline. Align the lace or cap so it sits comfortably without covering your eyebrows or shifting backward. For a natural look, gently press the lace down and secure with adjustable straps, clips, or tape if needed. When putting on a lace front wig, always start from the forehead and adjust toward the temples for the best results.
How long can you wear a lace front wig?
You can wear a lace front wig daily, but it’s best to limit continuous wear to 6–8 hours to keep your scalp healthy and prevent tension on your natural hair. For long-term use, remove the wig at night, gently cleanse your scalp, and let it rest. Proper care and using breathable, high-quality wigs like Arabella Hair’s human hair options can extend the lifespan of the wig while keeping it comfortable. Regularly adjusting and cleaning the wig also helps maintain a natural look.
<div class="dynamic-checkout__content" id="dynamic-checkout-cart" data-shopify="dynamic-checkout-cart"> <shopify-accelerated-checkout-cart wallet-configs="[{"name":"paypal","wallet_params":{"shopId":606076981,"countryCode":"US","merchantName":"Arabella Hair","phoneRequired":true,"companyRequired":false,"shippingType":"shipping","shopifyPaymentsEnabled":false,"hasManagedSellingPlanState":null,"requiresBillingAgreement":false,"merchantId":"CRANG3SAM4766","sdkUrl":"https://www.paypal.com/sdk/js?components=buttons\u0026commit=false\u0026currency=USD\u0026locale=en_US\u0026client-id=AfUEYT7nO4BwZQERn9Vym5TbHAG08ptiKa9gm8OARBYgoqiAJIjllRjeIMI4g294KAH1JdTnkzubt1fr\u0026merchant-id=CRANG3SAM4766\u0026intent=authorize"}}]" access-token="7624056235178b0f572597042a3a2f90" buyer-country="US" buyer-locale="en" buyer-currency="USD" shop-id="606076981" cart-id="0137e83ccbb7bfc3d55d52e74ed0dde2" enabled-flags="["1b55bc27","2d75a54c"]" > <div class="wallet-button-wrapper"> <ul class='wallet-cart-grid wallet-cart-grid--skeleton' role="list" data-shopify-buttoncontainer="true"> <li data-testid='grid-cell' class='wallet-cart-button-container'><div class='wallet-cart-button wallet-cart-button__skeleton' role='button' disabled aria-hidden='true'> </div></li> </ul> </div> </shopify-accelerated-checkout-cart> <small id="shopify-buyer-consent" class="hidden" aria-hidden="true"> One or more of the items in your cart is a recurring or deferred purchase. By continuing, I agree to the <span id="shopify-subscription-policy-button">cancellation policy</span> and authorize you to charge my payment method at the prices, frequency and dates listed on this page until my order is fulfilled or I cancel, if permitted. </small> </div>