Skip to content
Easy way to install wigs for beginners

Easy way to install wigs for beginners

Every wig wearer has a first time. That initial attempt at a proper wig installation can be filled with uncertainty — wondering if it looks natural, feels secure, or if you're even doing it correctly. But achieving a flawless look doesn't have to be a struggle.

This beginner-friendly guide by Arabella Hair is here to walk you through the entire process of how to install a wig with confidence. You'll discover the essential tools you need and learn the core techniques for how to wear a wig, both with and without glue. Let's get started on your journey to a perfect, natural-looking fit.

Essential Tools You Need for Installing a Wig

Tools for Wig Installation

Wig installation requires the right tools. Having these items on hand will make the process smoother and help you achieve a more natural, secure look when you wear a wig. Here is a list of essential tools for installing a wig:

● Wig Cap: Creates a flat base and helps secure your natural hair.

● Wig Glue or Adhesive: For a long-lasting, bonded installation.

● Wig Tape: An alternative to glue for secure attachment.

● Wig Comb/Brush: Used for detangling and styling the wig.

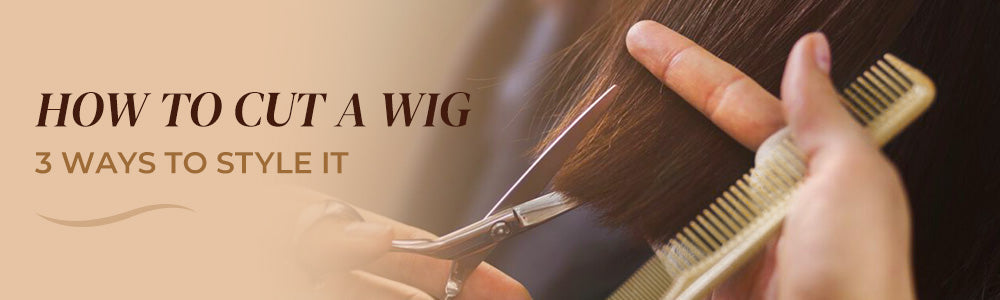
● Scissors: For trimming the lace on a lace front wig or customizing the style.

● Hair Gel or Mousse: Helps with styling and securing edges.

● Scalp Protector: Creates a barrier between your skin and the adhesive.

Do You Need a Wig Cap For Wig Installation?
If you have a bald head or very little hair, it's highly recommended to wear a wig cap. It helps secure the wig in place while protecting your natural hair. For those with sensitive scalps, a wig cap provides an extra layer of protection, reducing friction between your scalp and the wig.

The decision to use a wig cap — whether you have long, short, thick, or thin hair — ultimately depends on personal preference. Many modern human hair wigs even come with breathable, adjustable, and ergonomic wig caps for added comfort and flexibility.


How to Install a Wig With Glue

For a long-lasting and ultra-secure hold, using glue is a classic and trusted method. This approach is ideal for those who need their wig to stay firmly in place. If you're ready to learn how to install a wig with maximum security, follow this step-by-step guide for a flawless finish.

Step 1. Flatten Your Natural Hair

To ensure a secure and comfortable wig installation, it’s essential to start by smoothing out your natural hair. This helps create a flat surface for the wig, preventing bumps and ensuring it sits properly.

● If you have short hair: Apply a light-hold gel or mousse to slick down all hairs. Use a fine-tooth comb to flatten your hair against your scalp, directing it backward.

● If you have long hair: Braid your hair into flat cornrows going straight back or twist it into a low, flat bun at the nape of your neck. Then, securely tuck all loose ends and cover your hair with a wig cap that matches your scalp tone.


Flatten Natural Hair for Wig Installation


Step 2. Secure a Wig Cap

After preparing your hair, the next critical step in learning how to install a wig with glue is to secure a wig cap. This thin, skin-toned layer is essential as it protects your scalp and absorbs moisture. For comfort and performance, consider a cotton cap for breathability, a nylon/mesh cap for an ultra-thin profile, or a cap blended with aloe or bamboo for coolness and irritation-free wear.

Here's how to put it on naturally:

1. Hold the cap open with both hands and position it at your front hairline.

2. Stretch the cap over your head, ensuring it fully covers your pre-styled hair from the front to the nape of your neck.

3. Tuck any stray hairs or the edge of the cap neatly along your hairline.

4. Gently adjust the cap so it sits smoothly without any wrinkles or bumps, creating an ideal base for the next steps.


Step 3. Prepare Your Skin and Apply the Glue

A clean, oil-free surface is critical for the adhesive to bond securely during your wig installation. This step can make your wig look natural.

1. Cleanse the Perimeter: Using a cotton pad soaked with rubbing alcohol, thoroughly cleanse your entire hairline and the area where the wig will make contact. Allow it to fully evaporate; your skin should feel clean and taut.
2. Apply Scalp Protector (Optional but Recommended): Gently spray a scalp protector over the same area. This creates a protective barrier, minimizing potential skin irritation.
3. Apply the Wig Glue: Starting at your hairline, apply a very thin, even layer of liquid adhesive. For beginners, using a small, stiff brush provides the most control. A thin layer is key to preventing mess and ensuring comfort. Let this first layer become tacky and transparent. Then, apply a second thin layer and let it get tacky as well. This two-layer method guarantees a strong hold for installing a wig that lasts.


Apply the Glue for Wig Installation

Wig tape provides the same secure hold as wig glue, but without the mess. Simply cut the tape into small strips and apply them along your hairline. When you're ready to wear the wig, peel off the backing and gently position the wig on your head. Once it's in place, press down on the taped areas to secure it.


Step 4. Position and Secure the Wig

Proper positioning ensures a natural look and a secure fit for wig installation.

● Hold the wig at both temple points and carefully align its front edge precisely with your natural hairline.

● Starting from the center of your forehead, gently press the wig's lace onto the glue.

● Working outwards towards your temples, use your fingertips to carefully press and bond the rest of the lace front.

● Finally, use the palms of your hands to apply firm, even pressure across the entire front and sides of the wig for 30-60 seconds. This step ensures the wig feels comfortable and looks seamless when you wear a wig.


Step 5. Final Touches for a Natural Look

The final step in learning how to install a wig with glue is all about customization. For a lace front wig installation, for example, carefully trim the excess lace along the hairline using small scissors, getting as close to the hairline as possible without cutting the hair.

To further blend the look, you can style baby hairs along the front. Finally, use a soft-bristle brush or your fingers to style the wig as desired. A light mist of edge control or moisturizing spray can help lay down any flyaways, completing your flawless, natural-looking finish.


Put On a Wig


How to Install a Wig Without Glue

Unlike many traditional brands, Arabella Hair offers glueless wigs. They feature a built-in, breathable, and hygienic wig cap, making them suitable even for individuals with sensitive scalps or hair loss. Furthermore, many styles come with pre-plucked hairlines and pre-cut lace, allowing you to effortlessly put on a wig and achieve a natural look instantly. Crafted from 100% human hair, these wigs offer ultimate versatility — they can be heat-styled and dyed to match your personal aesthetic perfectly.

If you're planning to or have already purchased an Arabella Hair wig, the following simple steps will help you style it quickly.

Step 1. Flatten your natural hair under the built-in, comfortable wig cap. No separate cap is needed!

Step 2. Place the wig on your head, align it with your natural hairline, and then peel off the wig tape near your ears to secure the position.

Step 3. Adjust the elastic drawstring at the back to secure the wig and prevent slipping.

Step 4. Gently style the baby hair and blend the hairline with powder or foundation for a flawless finish.


How to Install a Glueless Wig


Bonus Tip: How to Find the Right Wig for Wearing

There are many fantastic wig websites online, but finding the perfect fit requires a little preparation. A correct size is the first step to a comfortable and natural-looking wig installation.

To find your size, use a soft measuring tape. Measure the circumference of your head from the front of your hairline, behind your ear, to the nape of your neck, behind the other ear, and then back to the front. Most brands, including Arabella Hair, provide a size chart to match your measurements to an average or large cap.

Beyond size, the wig's fiber is crucial for how you want to wear a wig.

● Human Hair Wigs: Offer the most versatility; they can be heat-styled, colored, and move naturally.
● Synthetic Wigs: Pre-styled and affordable, but they often cannot withstand high heat, limiting styling options.


Conclusion

Mastering how to install a wig opens up a world of style and confidence. Whether you choose the long-lasting security of a glued install or the effortless convenience of a glue-free wig from a brand like Arabella Hair, the key is finding a method that fits your lifestyle and comfort level. Arabella Hair's innovative designs, featuring built-in caps and pre-plucked hairlines, make it simpler than ever to achieve a flawless look. With the right techniques and a high-quality wig, you can confidently wear a wig that looks and feels beautifully natural every single day.

FAQs About How to Install a Wig

How to install a lace front wig?

To install a lace front wig, follow these steps:

● Braid your natural hair flat or use a wig cap for shorter hair.

● Clean the area around your hairline to remove oils and residue.

● Apply a thin layer of wig glue or tape along your hairline for a secure hold.

● Once the adhesive is tacky, position the wig starting from your forehead, aligning it with your hairline.

● Press down along the lace to stick it in place, using clips or combs for extra security if needed.

● Trim the excess lace carefully without cutting too close to the hairline.

● Apply foundation or concealer to blend the lace, then style the wig as desired.


What are common mistakes when installing a frontal wig?

Common mistakes when installing a frontal wig:

● Not Cleaning the Hairline: Dirty hairlines can affect adhesive effectiveness.

● Using Too Much Glue: Excess glue leads to a messy application and discomfort.

● Cutting the Lace Wrong: Cutting too close or unevenly can ruin the wig's look.

● Ignoring Fit: A poorly adjusted wig can cause discomfort or look unnatural.

● Skipping Lace Melting: Not using heat or makeup on the lace can leave visible lines.

● Not Blending Properly: Failing to match the wig with your skin tone makes the lace noticeable.


How to wear a wig when you have no hair?

To wear a wig without natural hair underneath, follow these steps for a secure fit. Start with a snug-fitting wig cap to create a smooth base and prevent slipping. If you have no hair, choose a cap with adjustable bands or Velcro for added security. Opt for a wig with adjustable straps or combs to ensure a secure fit. For extra hold, apply mild wig adhesive or tape along your hairline. Position the wig, aligning it with your natural hairline, and adjust for a comfortable fit. Once in place, style as desired, ensuring the cap and adhesive are hidden. For a seamless look, use makeup to blend the wig edges with your skin tone.


    Leave a comment

    This site is protected by hCaptcha and the hCaptcha Privacy Policy and Terms of Service apply.